January 14, 2023 by admin
Creating Beautiful Drop Caps in InDesign
2. How to Create an Advanced Drop Cap Effect
Step 1
You can give your paragraph’s text frame more of a creative look by creating a custom shape for the text to fill. You can create a range of shapes using the shape or drawing tools in InDesign, or use Adobe Illustrator to create something more unique.
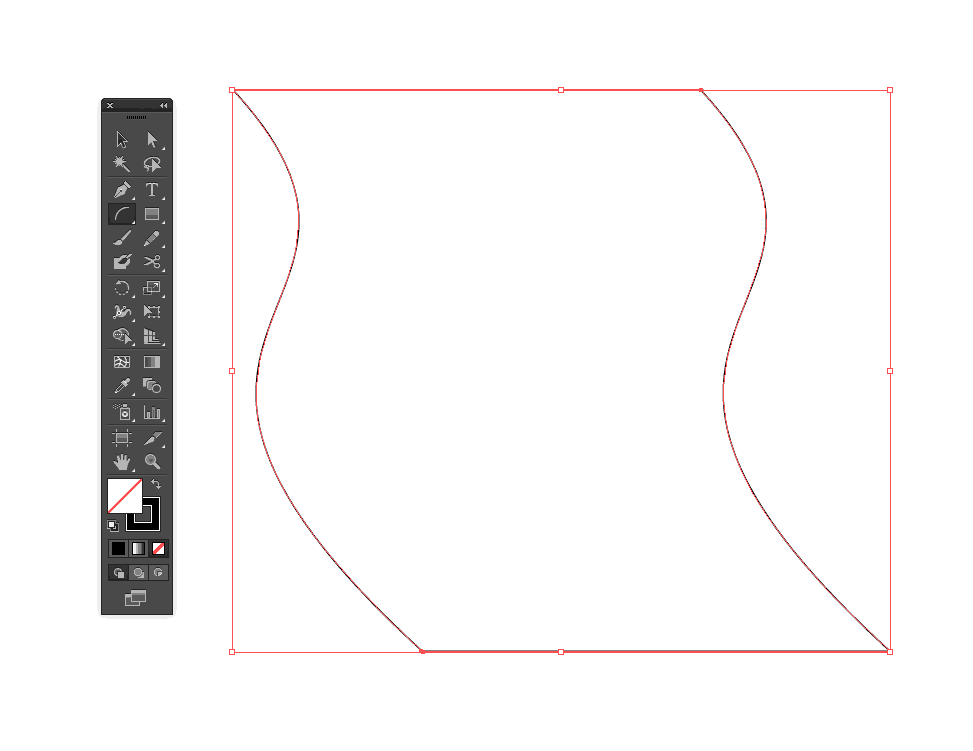
Use the Arc Tool and Line Segment Tool in Illustrator to create a curved rectangle shape.
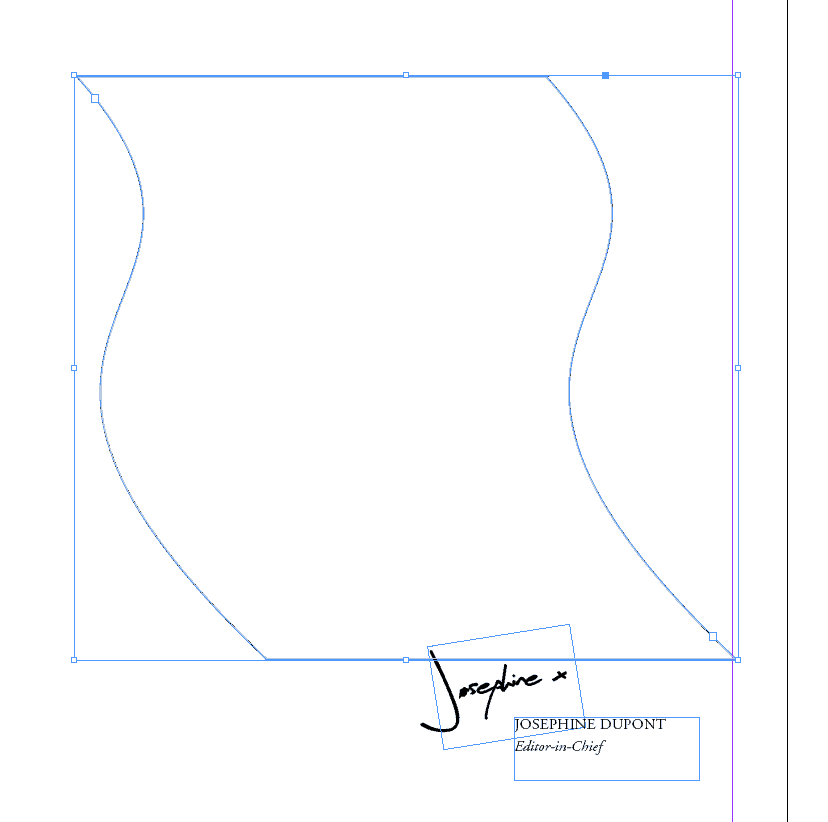
Then Edit > Copy the shape, return to InDesign and Edit > Paste the vector shape directly onto the page.
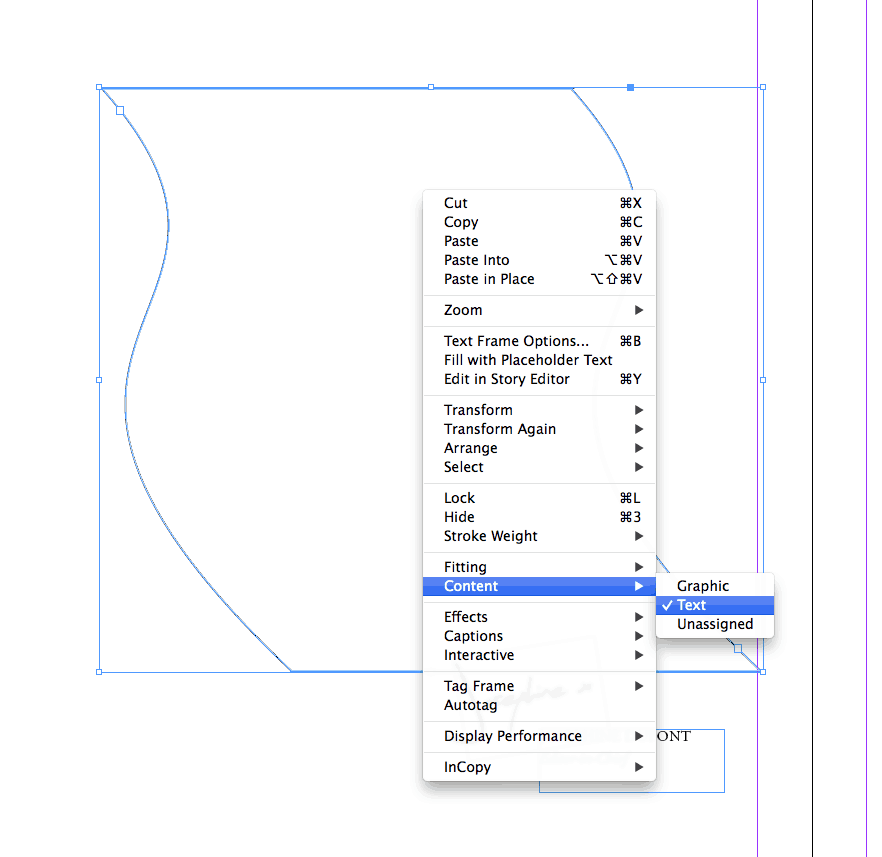
Right-Click (Windows) or Ctrl-Click (Mac) > Content > Text to transform any vector shape into a text frame.
Step 2
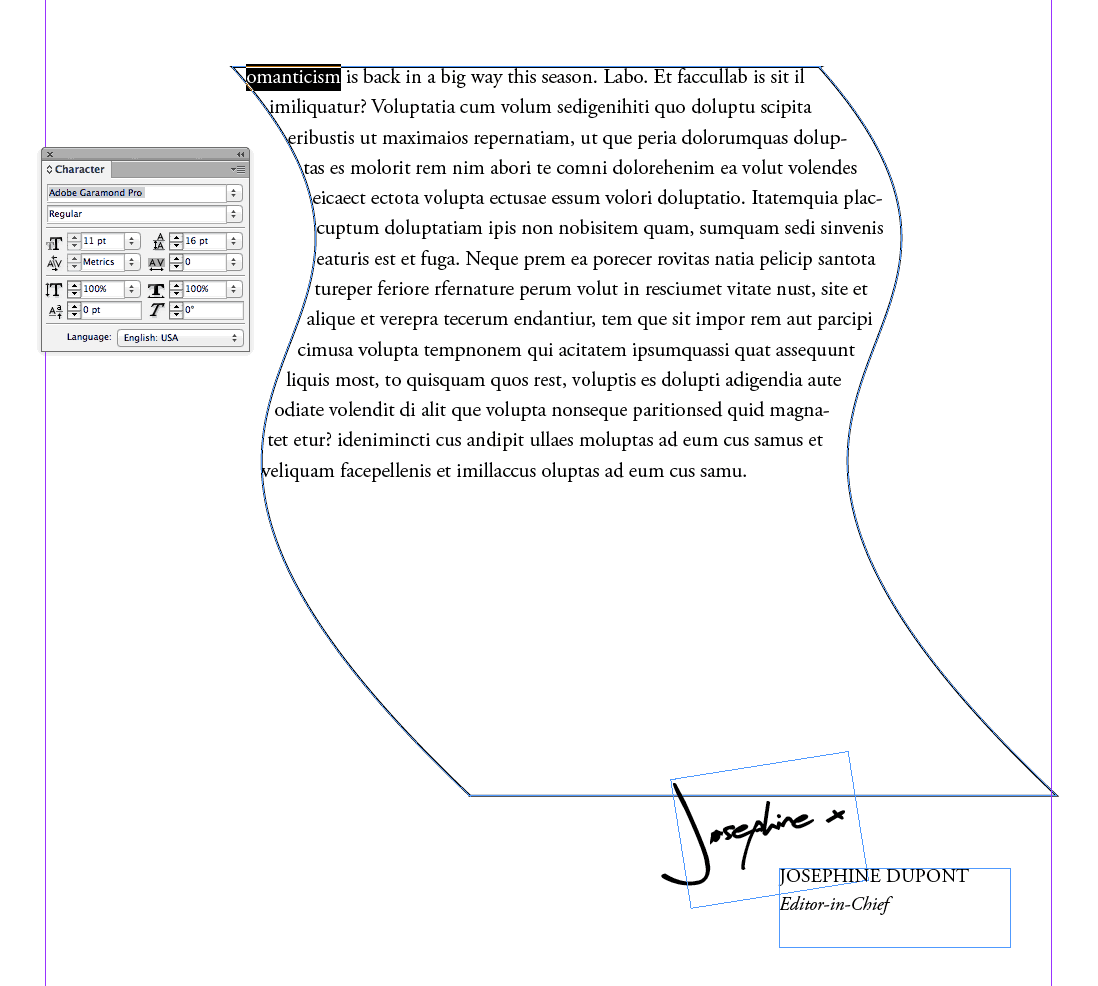
Fill your text frame with text, making sure to remove the first letter of the paragraph.
Create a second square text frame using the Type Tool (T), and type your intended drop cap character into the text frame (here, ‘R’).
Enlarge the character to your preferred size, and move into position over the top-left corner of the body text frame.
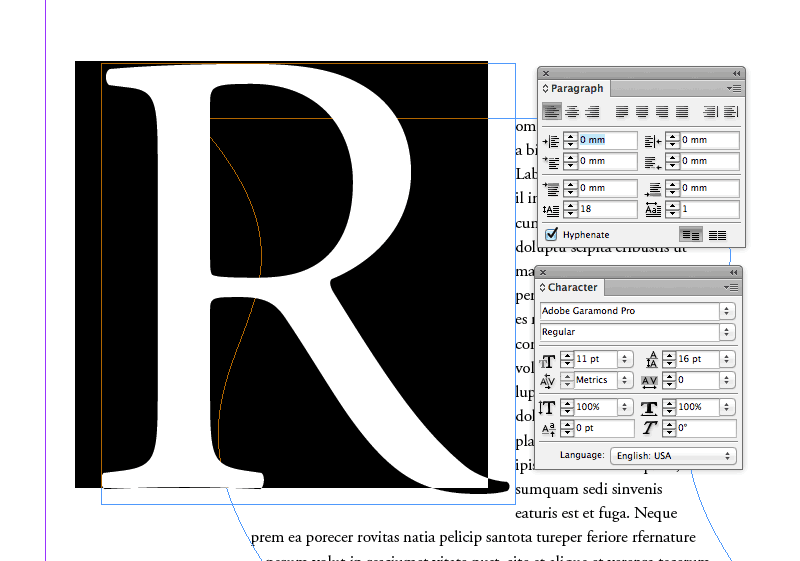
Step 3
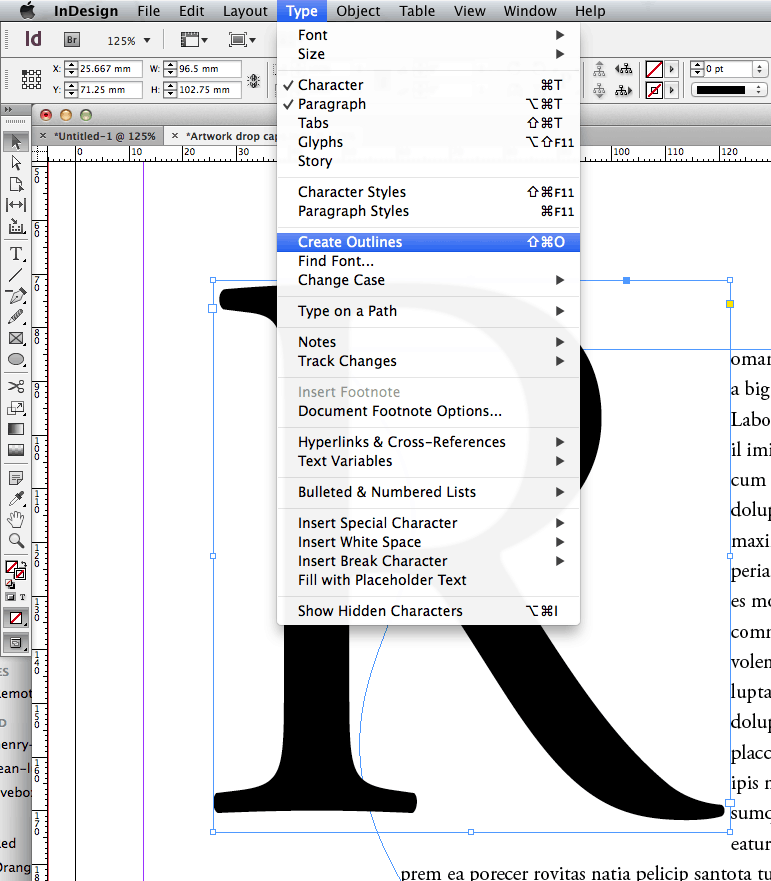
Highlight the drop cap letter, and then head up to Type > Create Outlines. The character will be vectorized.
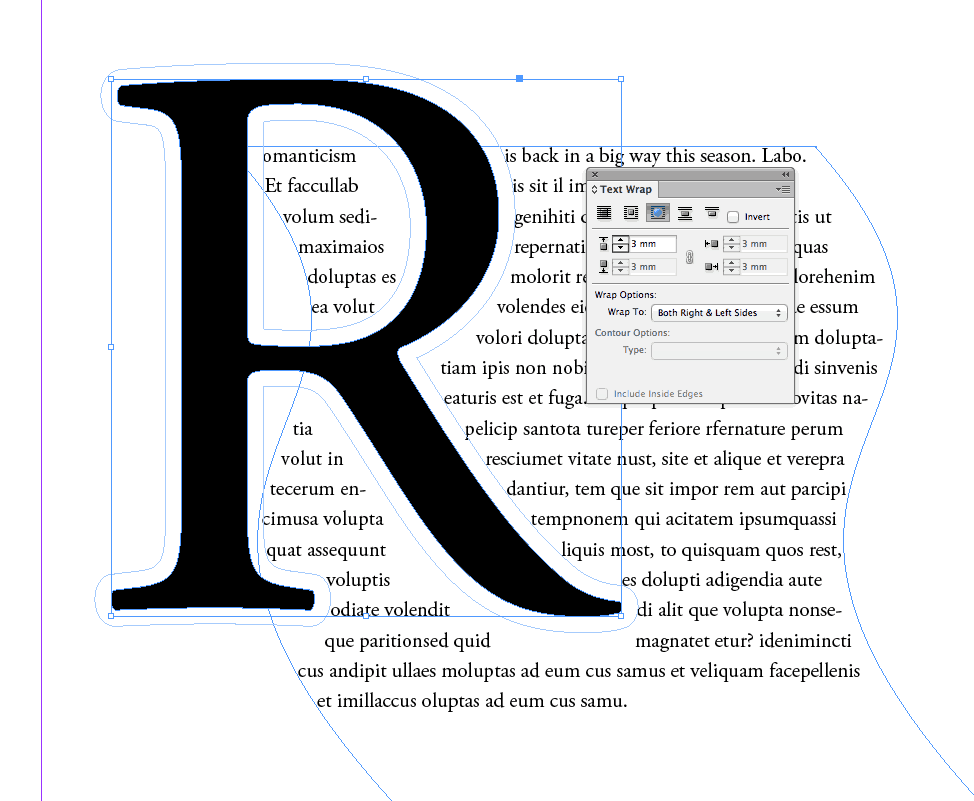
Then, with the vector drop cap selected, go to Window > Text Wrap. Set the text wrap option to Wrap Around Object Shape and tweak the Offset values to push the text away a little from the very edge of the letter.